MIDI Messages
With the foundation from the previous chapters, it is time to move into the more animated part of our journey.
Until now, we have talked about MIDI messages in very general sense, we touched bits, bytes, number systems, and how MIDI data is structured. You now understand why MIDI uses 7-bit values, how status and data bytes are distinguished, and how multi-byte values are assembled. In this chapter, we will put that knowledge to work.
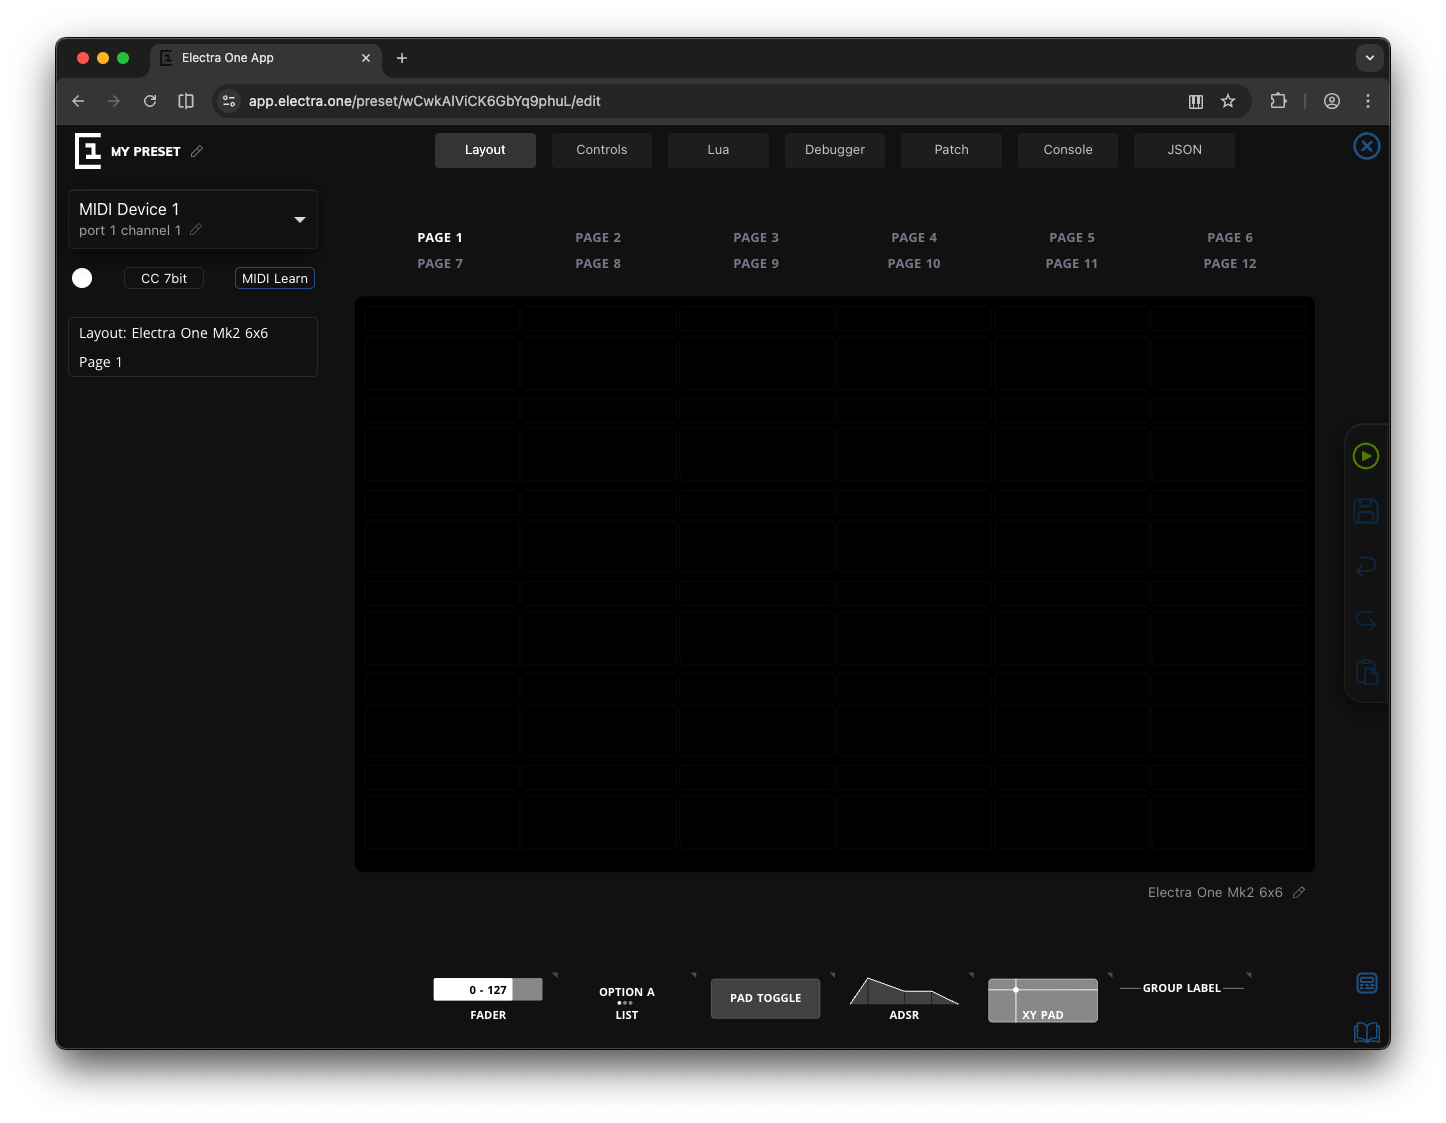
If you have an Electra One controller, open the web editor and create a new, empty project:
Do not worry if you are completely new to this. We will move step by step.
Earlier in this book, we described MIDI messages conceptually. Note On, Control Change, Program Change, Pitch Bend, and so on. Now we will look at them from a more technical perspective. For each message type, we will:
- Identify the status byte
- Decode the data bytes
- Examine their binary and hexadecimal forms
- Send them manually
- Observe what happens
Instead of only reading about MIDI messages, you will see the exact bytes being transmitted and interpreted. To do so we will use two tools:
- The Electra One hardware controller
- The MIDI Console in the Electra One web editor
The MIDI Console allows you to type and send raw MIDI data directly and observe incoming messages in real time. To open the MIDI Console, click the Console tab at the top of the editor window.
How MIDI Data Is Sent
MIDI data is transmitted as a sequence of bytes, each consisting of 8 bits. Every MIDI message is composed of a Status byte, which identifies the type of message and, in most cases, the MIDI channel, followed by zero or more Data bytes, which carry the actual parameters of that message.
A Status byte is easy to recognize: its msb is always set to 1. This means its numeric value falls within the range 128 to 255 (0x80 to 0xFF in hexadecimal). Because the most significant bit is 1, the receiving device immediately understands that a new message is beginning. For channel messages, the Status byte encodes both the message type, such as Note On or Control Change, and the channel number. We will decode this structure in detail shortly.
Data bytes, on the other hand, always have their msb set to 0. This limits their numeric range to 0 – 127 (0x00–0x7F in hexadecimal). The remaining seven bits carry the actual MIDI value, whether that is a note number, a velocity, a controller number, or a pressure value. Since data bytes can never have their msb set to 1, they can never be confused with a Status byte. This is precisely what makes the MIDI protocol self-synchronizing: the receiver can always detect where a new message begins.
The number of Data bytes depends entirely on the type of message being sent. Some messages consist of only a single Status byte and carry no Data bytes at all. Real-Time messages such as Start, Stop, or Clock are examples of this. Other messages contain one or two Data bytes. A Note On message, for instance, carries two: the first indicates which note (which key) was pressed, and the second specifies the velocity—how strongly it was struck.
SysEx messages are a special case. They begin with a Status byte but can contain a variable number of Data bytes, sometimes forming quite long messages. These are used for device-specific communication, and we will explore them in detail later in this chapter.
Status Byte
Every MIDI message begins with a Status byte. As we learned earlier, a Status byte is always recognizable because its msb is set to 1. This means its numeric value falls within the range 128 and 255 (0x80 to 0xFF).
This simple rule makes MIDI self-synchronizing: whenever a receiving device encounters a byte with its msb equal to 1, it knows that a new message begins.
The Status byte serves two purposes; it identifies the type of message and for certain message types, it also specifies the MIDI channel.
Not all MIDI messages use channels. For this reason, Status bytes fall into two major categories, the Channel messages and the System messages
Channel Messages
Channel messages are tied to one of the 16 MIDI channels. In these messages, the 8-bit Status byte is divided into two parts, the message type and the MIDI channel. If you ever wondered why there is 16 MIDI channels, there is the answer:
    4 bits             4 bits
 ---------------   ---------------
[ message type  ] [    channel    ]
The msb is usually included in the message type. I will follow that convention here so that we stay in line with other resources on the MIDI protocol. Given this we can say that the 4-bit message type follows the assigments given by this table:
| Message Type | Upper 4 Bits (Binary) | Hex Range | Data Bytes |
|---|---|---|---|
| Note Off | 1000 | 0x8n | 2 |
| Note On | 1001 | 0x9n | 2 |
| Polyphonic Aftertouch | 1010 | 0xAn | 2 |
| Control Change (CC) | 1011 | 0xBn | 2 |
| Program Change | 1100 | 0xCn | 1 |
| Channel Aftertouch | 1101 | 0xDn | 1 |
| Pitch Bend | 1110 | 0xEn | 2 |
The lower 4-bits are used for the MIDI channel. As we know, 4-bits provide exactly 16 distinct values.
For example:
0x92translates to binary:
1001 0010where:
1001 → Note On
0010 → Channel 3
So 0x92 represents a Note On message on Channel 3. If you looked at the channel bits carefully, you might say, wait 0010 is not 3, it is 2. Yes, that is correct. The reason is that MIDI channel 1 is assigned to value 0, and therefore all MIDI channels have their value in the Status byte shifted by one.
Note On
The Note On message is probably the most recognizable MIDI message. Its purpose is simple: it tells a receiving device to start playing a note.
When you press a key on a keyboard, a Note On message is sent.
The message itself is composed of the three bytes, the Status byte, and two Data bytes.
Status byte:
Decimal: 144 - 159
Hex: 0x90 - 0x9F
We provide a range of Status byte values because the MIDI channel number is encoded directly into the Status byte itself, as explained earlier in the section about status bytes.
The value 144 (0x90) represents a Note On message on MIDI Channel 1, while 159 (0x9F) represents a Note On message on MIDI Channel 16.
Byte sequence:
[ Status byte ] [ Note Number ] [ Velocity ]Both the Note Number and the Velocity are Data bytes. This means their values range from 0 to 127 (0x7F), and their msb is always set to 0.
Velocity, the third byte of a Note On message, represents how strongly a key was struck. It is expressed as a number between 0 and 127. A value of 0 corresponds to an inaudible strike, while 127 represents the maximum possible intensity. However, it is important to understand that velocity does not directly define loudness. The MIDI message merely transmits a number. How that number is interpreted depends entirely on the receiving device.
Most instruments use velocity to influence volume, making harder key presses produce louder sounds. But many go far beyond that. Modern synthesizers and samplers often treat velocity as an expressive control signal rather than just a measure of loudness. It may affect the brightness of the sound by modulating the filter cutoff frequency, the attack time, or even which sample is triggered.
Hidden fact
Most keyboards do not directly measure the force of your finger. Instead, they detect how quickly the key travels from its resting position to the fully pressed position. The faster the movement, the higher the resulting velocity value.
To make playing feel more natural, many instruments implement what are known as velocity curves. These curves adjust how the numeric velocity values are translated into audible results. Instead of responding in a strictly linear fashion, the instrument may shape the response to better match a player's touch. A softer curve may make it easier to produce loud notes, while a harder curve may require more force to reach higher velocity values.
Example (Note On, channel 1):
144 60 100
0x90 0x3C 0x64
If a MIDI device capable of producing sound is configured to listen on MIDI channel 1, it will start playing note 60 (Middle C) with a velocity of 100.
The note will continue to sound until the device receives a corresponding Note Off message, see below. Unlike notes written in sheet music, a Note On message does not contain any information about the duration of the note.
The following table helps you translate musical note names into their MIDI note numbers, shown in decimal format:
| Note | -1 | 0 | 1 | 2 | 3 | 4 | 5 | 6 | 7 | 8 | 9 |
|---|---|---|---|---|---|---|---|---|---|---|---|
| C | 0 | 12 | 24 | 36 | 48 | 60 | 72 | 84 | 96 | 108 | 120 |
| C# | 1 | 13 | 25 | 37 | 49 | 61 | 73 | 85 | 97 | 109 | 121 |
| D | 2 | 14 | 26 | 38 | 50 | 62 | 74 | 86 | 98 | 110 | 122 |
| D# | 3 | 15 | 27 | 39 | 51 | 63 | 75 | 87 | 99 | 111 | 123 |
| E | 4 | 16 | 28 | 40 | 52 | 64 | 76 | 88 | 100 | 112 | 124 |
| F | 5 | 17 | 29 | 41 | 53 | 65 | 77 | 89 | 101 | 113 | 125 |
| F# | 6 | 18 | 30 | 42 | 54 | 66 | 78 | 90 | 102 | 114 | 126 |
| G | 7 | 19 | 31 | 43 | 55 | 67 | 79 | 91 | 103 | 115 | 127 |
| G# | 8 | 20 | 32 | 44 | 56 | 68 | 80 | 92 | 104 | 116 | — |
| A | 9 | 21 | 33 | 45 | 57 | 69 | 81 | 93 | 105 | 117 | — |
| A# | 10 | 22 | 34 | 46 | 58 | 70 | 82 | 94 | 106 | 118 | — |
| B | 11 | 23 | 35 | 47 | 59 | 71 | 83 | 95 | 107 | 119 | — |
And here is the same mapping again, this time shown in hexadecimal notation. To keep the table easier to read, we omit the 0x prefix:
| Note | -1 | 0 | 1 | 2 | 3 | 4 | 5 | 6 | 7 | 8 | 9 |
|---|---|---|---|---|---|---|---|---|---|---|---|
| C | 00 | 0C | 18 | 24 | 30 | 3C | 48 | 54 | 60 | 6C | 78 |
| C# | 01 | 0D | 19 | 25 | 31 | 3D | 49 | 55 | 61 | 6D | 79 |
| D | 02 | 0E | 1A | 26 | 32 | 3E | 4A | 56 | 62 | 6E | 7A |
| D# | 03 | 0F | 1B | 27 | 33 | 3F | 4B | 57 | 63 | 6F | 7B |
| E | 04 | 10 | 1C | 28 | 34 | 40 | 4C | 58 | 64 | 70 | 7C |
| F | 05 | 11 | 1D | 29 | 35 | 41 | 4D | 59 | 65 | 71 | 7D |
| F# | 06 | 12 | 1E | 2A | 36 | 42 | 4E | 5A | 66 | 72 | 7E |
| G | 07 | 13 | 1F | 2B | 37 | 43 | 4F | 5B | 67 | 73 | 7F |
| G# | 08 | 14 | 20 | 2C | 38 | 44 | 50 | 5C | 68 | 74 | — |
| A | 09 | 15 | 21 | 2D | 39 | 45 | 51 | 5D | 69 | 75 | — |
| A# | 0A | 16 | 22 | 2E | 3A | 46 | 52 | 5E | 6A | 76 | — |
| B | 0B | 17 | 23 | 2F | 3B | 47 | 53 | 5F | 6B | 77 | — |
Note Off
After understanding the Note On message, the purpose of the Note Off message becomes almost self-evident: it tells the receiving device to stop playing a note.
When a Note On message is received, the instrument begins sounding the specified note. This also means the instrument must keep track of which notes are currently active. When a Note Off message arrives, the device checks whether the corresponding note number is still active. If it is, the instrument stops that note.
On a sending device, such as a MIDI keyboard, a Note Off message is typically transmitted when the key is released. In digital audio workstations (DAWs) and sequencers, Note Off messages are generated automatically according to how notes are placed in the piano roll or notation editor.
Good to know
In many software applications, MIDI messages are referred to as MIDI events.
The structure of a Note Off message is almost identical to Note On. It consists of a Status byte followed by two Data bytes.
Status byte:
Decimal: 128–143
Hex: 0x80–0x8F
As with Note On, the Status byte encodes both the message type and the MIDI channel.
Byte sequence:
[ Status byte ] [ Note Number ] [ Velocity ]In the case of Note Off, the velocity represents how quickly the key was released. This is sometimes called release velocity. Just like Note On velocity, it ranges from 0 to 127. Some instruments use this value to influence how the sound fades out. For example, a faster key release might result in a sharper or brighter release phase of the sound.
However, not all keyboards transmit release velocity, and not all sound modules respond to it. MIDI follows a practical principle: if a device does not support a particular feature, it simply ignores that part of the message. For that reason, many keyboards send a constant release velocity, and many instruments do not alter the sound based on it at all.
Example:
128 60 64
0x80 0x3C 0x40
If a MIDI device was currently playing note 60 (Middle C), this Note Off message would terminate the note and apply a release velocity of 64.
Note On with Velocity 0
A special case exists within the Note On message. If a Note On message is sent with a velocity value of 0, it is treated exactly the same as a Note Off message. The Status byte remains the same as for Note On. Only the velocity changes:
144 60 0
0x90 0x3C 0x00
At first glance, this may seem confusing. Why would a Note On message stop a note? The answer lies in efficiency and a mechanism called running status. We will explore running status in detail in the next chapter.
The first exercise
It is time for the first hands-on exercise. We will create a small project and use the MIDI Console to explore Note On, Note Off, and MIDI channels in a way you can see and hear immediately.
If you did not create a new project at the beginning of this chapter, do that now. You should be looking at a new, empty Electra One project, similar to this:
In the top-right corner of the editor, click on the preset name (it will most likely say My Preset) and rename it to Note On/Off. Giving your preset a meaningful name may seem like a small step, but it is a good habit—especially once your project list starts to grow.
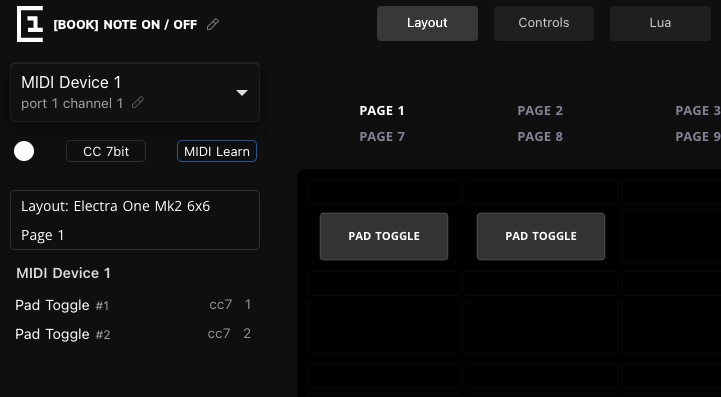
Next, we will add two PAD TOGGLE controls to the layout. Drag a PAD TOGGLE control from the repository at the bottom of the screen into the first slot of the grid. Then drag a second PAD TOGGLE control into the next slot beside it. When you are done, your layout should look similar to the image below.
If you are using an Electra One Mini, the preview will look slightly different because the Mini uses a 4×2 grid layout. The principle, however, is exactly the same.
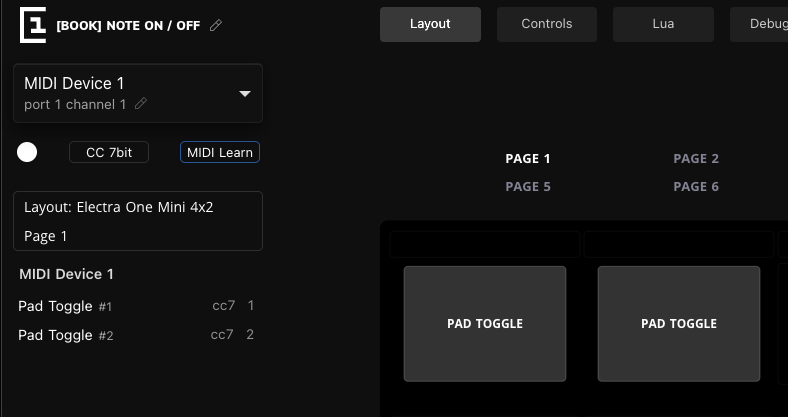
From this point on, the demonstration will be shown on the Electra One Mk2. If you are working with the Mini, simply adapt the layout visually, the configuration steps remain identical.
At this stage, you have created two Pads on the layout. A Pad represents a simple On/Off control, and in this case it is configured as a toggle. That means each time you tap it, or press the corresponding encoder on the Mini, it switches between its two states. One state will send a Note On message, and the other will send the corresponding Note Off.
Take a moment to look at the left sidebar of the editor. It provides a brief summary of how the controls on the layout grid are configured. You should see that the first pad is currently assigned a Control Change message (cc7 #1), and the second pad is assigned a different Control Change message (cc7 #2). Both pads are set to use MIDI Device 1 on Port 1, and both are configured to MIDI Channel 1.
In other words, at the moment, both pads are sending Control Change messages to the same device on the same channel. That is not what we want for this exercise.
Now we will modify the configuration so that both pads send Note messages instead, specifically note C4 (note number 60). The first pad will be assigned to MIDI Device 1 on Port 1, using MIDI Channel 1. The second pad will be assigned to MIDI Device 2 on Port 1, using MIDI Channel 2.
By doing this, we will create a clear difference between the two pads. Although they will send the same note number, they will do so on different channels and, effectively, to different devices. This will allow us to see how the channel information encoded in the Status byte determines which instrument responds.
Let’s adjust the Pads so that they send Note messages instead of Control Change messages.
Click on the first pad in the editor. The Control editor will appear in the left sidebar, showing all configuration options for the selected control. Make the following changes:
- Change the name to C4 (instead of PAD TOGGLE).
- Select an orange color.
- Set Message Type to Note.
- Change the Note Number to 60 (which corresponds to C4).
Next, click on the second pad to configure it. Apply the following changes:
- Change the name to C4 (instead of PAD TOGGLE).
- Select a blue color.
- Change the MIDI Device to MIDI Device 2, using Port 1, Channel 2.
- Set Message Type to Note.
- Change the Note Number to 60 (C4).
When you are done, press Escape or click the Close icon at the top of the sidebar to hide the editor panel.
The layout should now look similar to this:
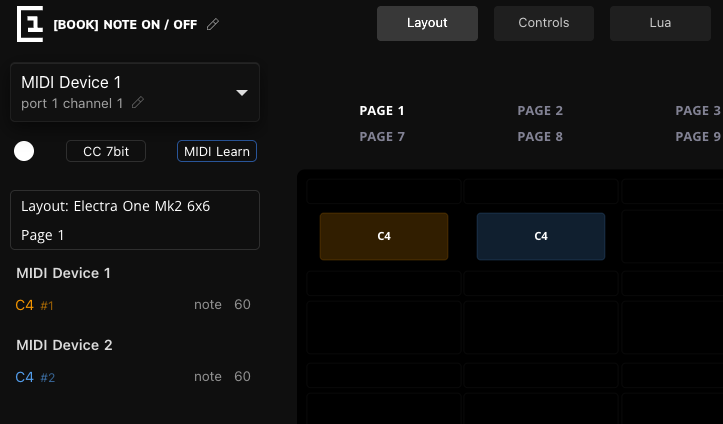
Take a moment to review what you have just done. Both pads now send the same note C4, but they are assigned to different MIDI devices and different channels. Although the musical note number is identical, the Status byte will differ because the channel information is encoded within it. In the next step, we will open the MIDI Console and observe exactly how this difference appears in the transmitted data.
Good to know
In Electra One, the message type Note represents both Note On and Note Off.
When the Pad is activated, a Note On message is sent. When it is deactivated, a corresponding Note Off message is transmitted automatically.
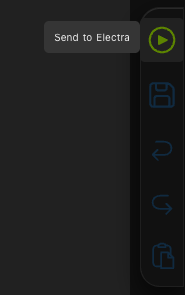
It is time to have some fun. Click the Play button to send the preset to the controller:
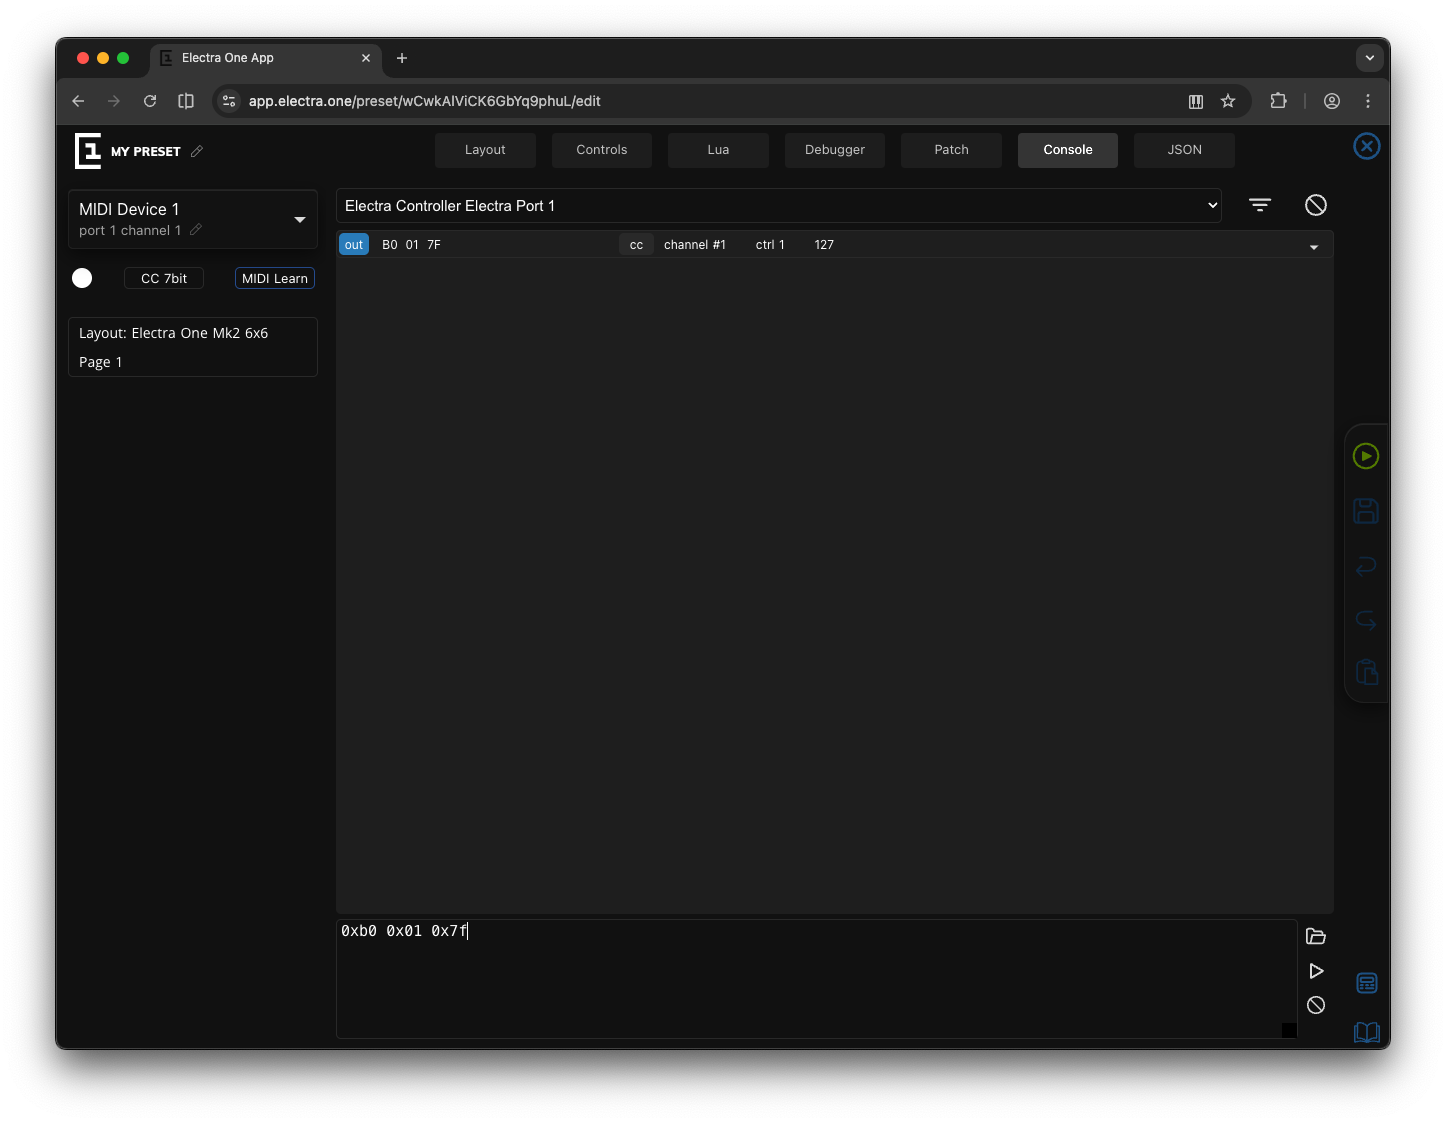
Open the MIDI Console by clicking the Console tab at the top of the editor. The Console is divided into two sections. The upper section is the monitor window, where you can observe incoming and outgoing MIDI data. The lower section is the data entry area, which allows you to send MIDI messages manually by typing them in.
With the MIDI Console open, tap the first (orange) Pad. The Pad will become highlighted, indicating that the note is currently active. Tap it again, and the highlight will disappear, meaning the note has been released.
Now look at the monitor window. You should see two new entries similar to the following:


These entries confirm that a Note On message was sent on MIDI Channel 1 when the Pad was activated, followed by a corresponding Note Off message when the Pad was deactivated. The MIDI Console allows you to see exactly what is happening behind the scenes - every tap of the Pad results in a precise sequence of bytes being transmitted.
So far, we have observed the sending side of the Pad. Now let’s look at the receiving side.
In the Console’s data entry field at the bottom, type:
144 60 127If you have been following the previous chapters carefully, you already know what this means. The value 144 represents a Note On message on MIDI Channel 1. The number 60 corresponds to note C4, and 127 is the maximum velocity.
As soon as you press Enter, the orange Pad becomes highlighted. It has received a matching Note On message and switched to its active state.
Now type:
128 60 127and press Enter again.
The highlight disappears. You have just sent a Note Off message on MIDI Channel 1 for note 60, which deactivates C4.
What you have just demonstrated is an important concept: the Pad does not care whether the message originates from your finger or from the MIDI Console. It simply reacts to incoming MIDI data that matches its configuration. This is MIDI in its purest form—devices sending and receiving well, defined byte sequences that carry musical meaning.
The monitor will inform you about the outbound MIDI messages you just sent:

At this point, you should already have a good feel for how this works. Now it is time to experiment a little. Try sending a few MIDI messages yourself from the Console and observe how the Pads respond.
You are not limited to decimal notation. The MIDI Console also accepts hexadecimal values.
For example, the following message plays C4 at velocity 127 on Channel 1:
0x90 0x3C 0x7FNow try the same note on Channel 2. Notice how only the lower nibble of the Status byte changes. The message type (0x9_) remains the same, but the channel value increments from 0 to 1:
0x91 0x3C 0x7FThis should activate the blue Pad, because it is assigned to Channel 2.
To stop the note using the “Note On with velocity 0” technique, type:
0x91 0x3C 0x00The blue Pad will deactivate.
The MIDI Console also supports convenient text shortcuts for common message types. For example, you can type:
ch 2 on 60 127to play C4 on Channel 2 again.
To stop it, type:
ch 2 off 60 32And to stop C4 on Channel 1, use:
ch 1 off 60 32Take a few minutes to experiment. Try different velocities, try different channels, and observe how the Pads react. The more you play with it, the more natural the relationship between bytes and musical behavior will become.
If you would like a more detailed description of all MIDI Console features and shortcuts, refer to the User Guide.
Congratulations! You have completed the first exercise.
You now know how to use toggle Pads, assign MIDI devices and message types, and observe and send data using the MIDI Console. You have also seen how raw MIDI bytes translate into actual behavior on the controller.
Next, we will move on to Control Change messages.
Control Change
Purpose: Change a continuous or switch parameter Status byte: Decimal: 176–191 Hex: 0xB0–0xBF Byte sequence:
[ Status ] [ Controller Number ] [ Value ]Example (CC 7 Volume):
176 7 100
0xB0 0x07 0x64
Program Change
Purpose: Select preset or instrument Status byte: Decimal: 192–207 Hex: 0xC0–0xCF Byte sequence:
[ Status ] [ Program Number ]Example:
192 10
0xC0 0x0A
Note: Only 2 bytes, no value byte.
Pitch Bend
Purpose: Smooth pitch control Status byte: Decimal: 224–239 Hex: 0xE0–0xEF Byte sequence:
[ Status ] [ LSB ] [ MSB ]Value range: 14-bit (0–16383), center = 8192 Example (center):
224 0 64
0xE0 0x00 0x40
Channel Pressure (Channel Aftertouch)
Purpose: Pressure affecting entire channel Status byte: Decimal: 208–223 Hex: 0xD0–0xDF Byte sequence:
[ Status ] [ Pressure ]Example:
208 80
0xD0 0x50
Polyphonic Key Pressure
Purpose: Pressure per individual note Status byte: Decimal: 160–175 Hex: 0xA0–0xAF Byte sequence:
[ Status ] [ Note Number ] [ Pressure ]Example:
160 60 90
0xA0 0x3C 0x5A
System Exclusive (SysEx)
Purpose: Manufacturer-specific data Status bytes: Start: 240 (0xF0) End: 247 (0xF7) Byte sequence:
0xF0 [ Manufacturer ID ] [ Data... ] 0xF7Example:
240 67 16 76 0 247
0xF0 0x43 0x10 0x4C 0x00 0xF7
MIDI Clock
Purpose: Tempo synchronization Status byte: Decimal: 248 Hex: 0xF8 Byte sequence:
248
0xF8
Sent 24 times per quarter note.
Start
Purpose: Start playback Status byte: Decimal: 250 Hex: 0xFA
250
0xFA
Continue
Purpose: Resume playback Status byte: Decimal: 251 Hex: 0xFB
251
0xFB
Stop
Purpose: Stop playback Status byte: Decimal: 252 Hex: 0xFC
252
0xFC
Active Sensing
Purpose: Connection monitoring Status byte: Decimal: 254 Hex: 0xFE
254
0xFE
System Reset
Purpose: Reset all devices Status byte: Decimal: 255 Hex: 0xFF
255
0xFF
Summary
MIDI communication is based on small byte sequences where the status byte defines the message type and channel, followed by one or two data bytes carrying parameters. Understanding the decimal and hexadecimal values of MIDI messages — and their byte order — is essential for low-level MIDI programming, debugging, and working with MIDI APIs such as Electra One’s Lua Extension.