Settings
The Settings screen allows you to customize and manage various aspects of the controler's behavior and functionality. The Settings screen can be accessed from the main Menu.
The screen is divided into several tabs, each focused on a specific configuration domain:
- Interface – Adjust settings that affect the behavior of the user interface.
- Preset Banks – Manage preset banks stored on the device.
- Remote Knobs – Configure support for external MIDI controllers used to extend Electra One’s knobs.
- MIDI Control – Set up control of Electra One using incoming MIDI messages.
- Buttons – Customize the functions assigned to Electra One’s hardware buttons.
- System Info – View information about the Electra One hardware and runtime resources.
To switch between tabs, simply tap the corresponding tab.
Each tab is covered in detail in the following sections.
Interface
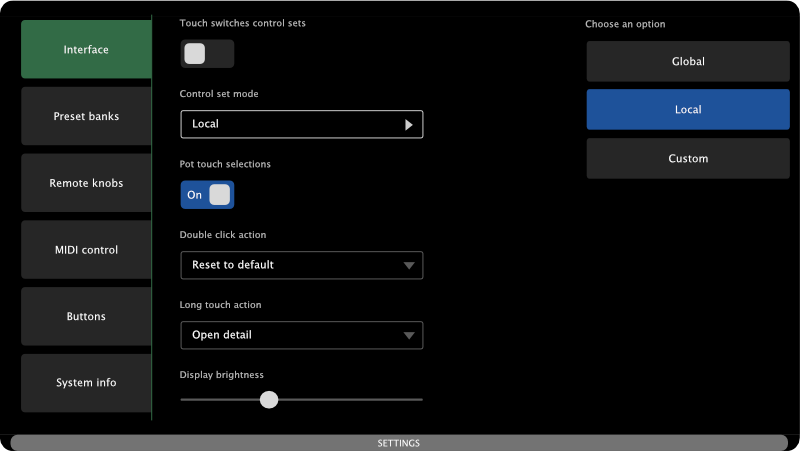
The Interface tab allows you to configure how you interact with the Electra One controller. These settings control how touch, knob actions, and display behavior are interpreted, enabling you to tailor the experience to your preferences.
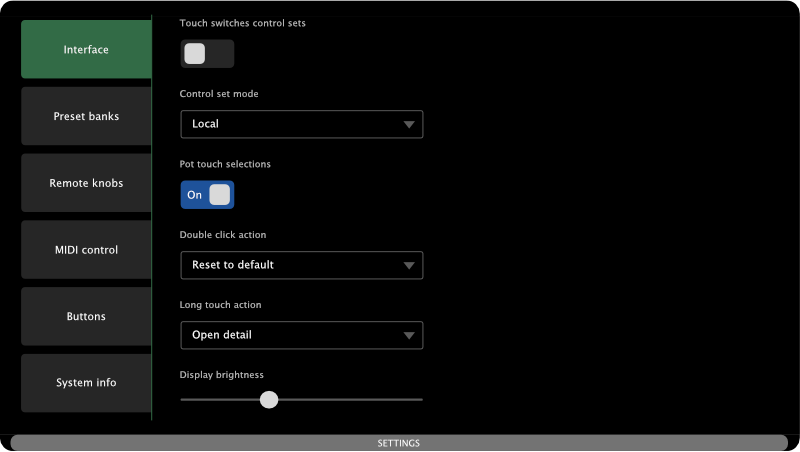
The tab includes the following options:
Touch Switches Control Sets
When enabled, touching the screen will automatically switch to the corresponding active control set. When disabled, you’ll need to use hardware buttons (configured accordingly) to switch between control sets.
Control Set Mode
Defines how control sets are handled:
- Global – The active control set is shared across all preset pages. Changing the page does not change the control set.
- Local – Each preset page remembers its own active control set. When you return to a page, it restores the control set that was active when you last left it.
- Custom – Each preset page uses a default control set, as defined in the preset. If no default is specified, the first control set is selected when switching to that page.
Pot Touch Selections
When enabled, pot (knob) touch can be used to make selections on pages such as Preset Selection, Page Selection, Snapshot Bank Selection, and others. When disabled, selections must be made using the touchscreen only.
Double Click Action
Defines what happens when you double-tap a control on the touchscreen:
- None – No action is triggered.
- Reset to default – Resets the control’s current value to its default setting.
- Open detail – Opens the detail window for the selected control.
Long Touch Action
Defines what happens when you touch and hold a control on the touchscreen. The available actions are the same as for the double-tap gesture:
- None – No action is triggered.
- Reset to default – Resets the control’s current value to its default setting.
- Open detail – Opens the detail window for the selected control.
Display Brightness
Adjusts the screen brightness to suit different lighting conditions. This setting helps reduce eye strain and power consumption, especially in low-light or on-stage environments.
If your USB host (e.g. a MIDI router) does not supply enough power for the Electra One, lowering the backlight brightness can help reduce the controller’s power requirements.
Preset Banks
Electra One provides six preset banks for organizing and accessing your presets. Each bank can be customized to help you organize the color-coding to your needs.
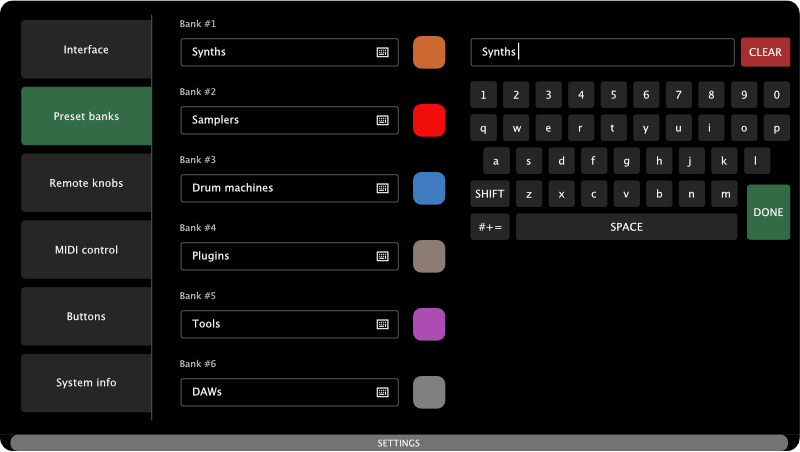
For each bank you can set:
- Name – You can assign a custom name to each bank using the on-screen keyboard. This helps identify the purpose or contents of each bank at a glance. To open the on-screen keyboard, tap on the Bank name text field.
- Color – A color can be selected from a set of predefined options, making it easier to visually distinguish between banks. To change the color, tap on the color button next to the Bank name text field.
Remote Knobs
The Remote Knobs feature allows you to control on-screen parameters using external MIDI controllers that send MIDI CC (Control Change) messages. This expands Electra One’s control surface, enabling more hands-on control or automation from software and hardware.
Key capabilities:
- Map external CC messages to Electra One controls, enabling real-time interaction with on-screen parameters.
- Use external MIDI controllers to expand the number of physical knobs available for hands-on control.
- Automate control changes from a computer or DAW by sending CC messages to Electra One.
- Send CC messages back out when controls are adjusted using Electra One’s knobs or touchscreen.
Because Electra One sends out the same CC messages it receives via Remote Knobs, these messages can be recorded as automation in a DAW and played back later. This allows users to automate even non-CC parameters—such as SysEx, NRPN, or Lua-triggered functions—by simply recording and replaying standard CC automation.
Example: Automating SysEx with a DAW
Let’s say you’re controlling a vintage synthesizer that only accepts SysEx messages for parameter changes. Normally, automating SysEx in a DAW is difficult or unsupported, but with Electra One’s Remote Knobs, this becomes easy.
- Assign a Remote Knob CC (e.g., CC #21 on MIDI Channel 1) to a control in your preset that sends a SysEx message.
- In your DAW, record automation for CC #21 by adjusting that parameter on Electra One, or by sending CC messages from another controller.
- When you play the automation back, the DAW sends CC #21, which Electra One interprets through the Remote Knobs mapping and converts to the appropriate SysEx message.
This lets you automate complex SysEx messages using simple CC data, without needing SysEx support in your DAW.
Configuration
The Remote Knobs feature allows up to 36 MIDI CC messages to be mapped to 36 control slots, arranged in a 6×6 grid. These slots correspond to fixed positions on Electra One’s preset pages and the performance page.
You can configure each Remote Knob slot by assigning:
- A MIDI CC number
- A MIDI CC type: absolute or relative
- A MIDI channel
- A MIDI interface from which the CC messages will be received
When a mapped CC message is received, Electra One updates the corresponding control in real time.
The configuration of Remote Knob assignments is global—shared across all preset pages and the performance page. This means, for example, that if CC #21 is mapped to control the first slot (row 1, column 1), it will control the control in that same position on every preset page and also on the performance page.
This consistent mapping makes it easy to build external controller templates and automation workflows that function seamlessly throughout your preset. By using the Performance page, you can create a dedicated selection of preset controls you want to automate or control remotely, without needing to rearrange or modify the original preset layout.
The configuration of Remote Knobs is divided into three sections, each accessible from its own screen within the Remote Knobs tab:
- Message Mappings
- Inbound MIDI Routing
- Outbound Interface
You can switch between these screens by swiping left or right on the touchscreen.
Midi Mappings
The MIDI Mappings screen allows you to assign incoming MIDI CC messages to individual control slots using MIDI Learn. This is where you define which CC messages will control which on-screen controls via the Remote Knobs feature.
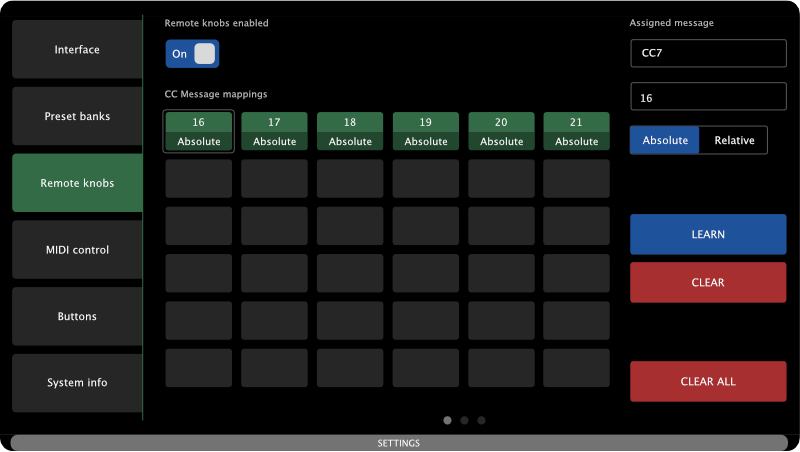
You can select any slot on the 6×6 grid by tapping it. The selected slot is highlighted with a light gray outline.
- Unused slots are shown in dark gray.
- Mapped slots are shown in green, displaying the assigned CC number and message type (absolute or relative).
An example:

Represents a CC #16, send as a absolute value.
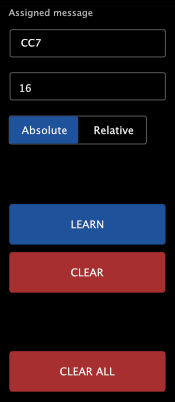
The sidebar on the right displays information and options for the currently selected slot, including:
- The CC message number
- The CC message type (absolute or relative)
- A button to re-learn the MIDI message
- A button to clear the mapping and to clear all mappings
The screen also includes a global enable/disable switch for the Remote Knobs feature. Disabling this switch does not delete your mappings, it simply suspends the Remote Knobs functionality until re-enabled.
An example of mappings:
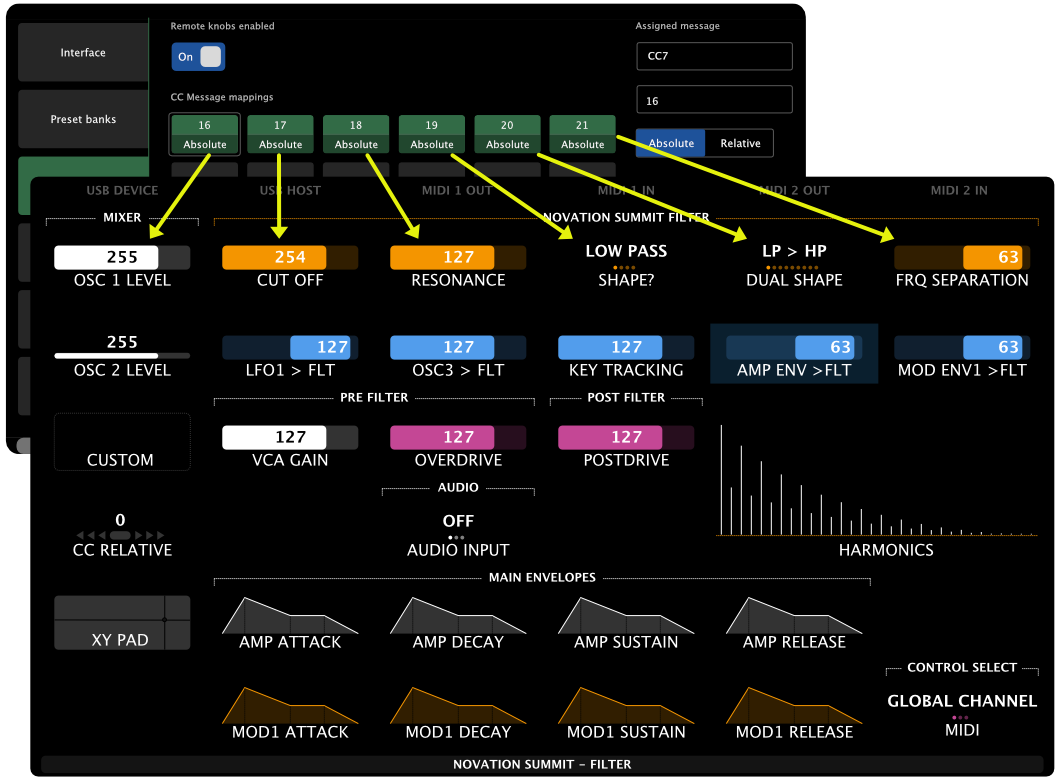
The image above shows CC #16 assigned to control the first slot of the preset page, CC #17 assigned to the second slot, and so on.
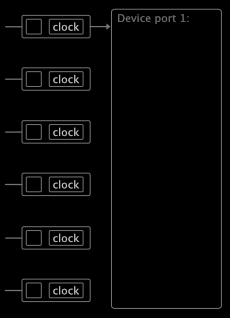
Inbound MIDI Routing
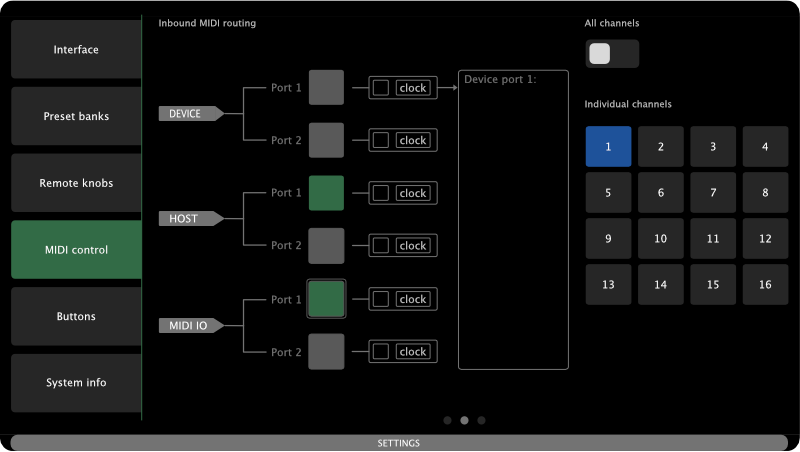
The Inbound MIDI Routing screen determines which MIDI inputs Electra One will listen to for Remote Knobs messages. The layout is similar to the Router Configuration screen, with each input source (MIDI interface and port) displayed in a separate row.
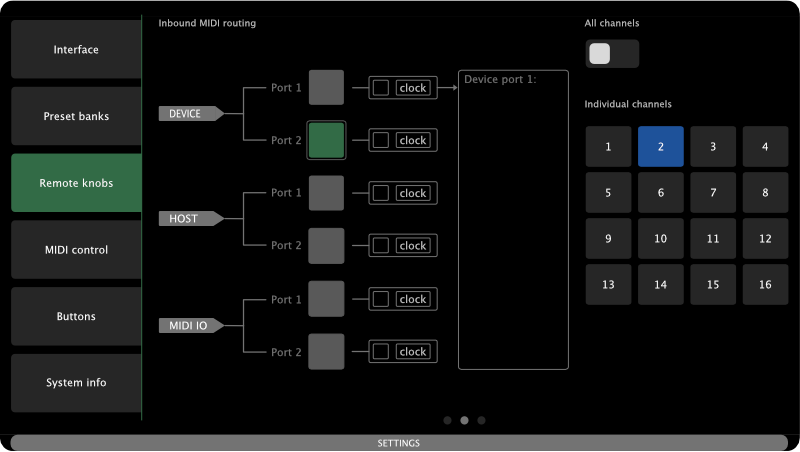
Each row includes a checkbox to turn Remote Knobs processing on or off for that input source.
- When active, the checkbox appears green, and incoming CC messages will be interpreted as Remote Knobs input.
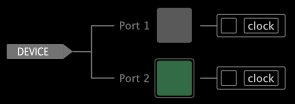
- When inactive, it appears gray, and messages from that source are ignored.
To assist with setup and troubleshooting, the screen also includes:
- MIDI activity indicators
- A MIDI log window
These tools display incoming MIDI data in real time. See the Router section of this manual for more details on how they work.
A sidebar on the right lets you configure which MIDI channels are used for each selected input. When you select a row, its checkbox is highlighted with a light gray outline, and the sidebar displays the channel settings for that input.
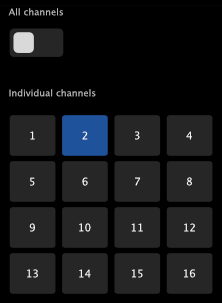
You can choose to listen on:
- All MIDI channels, or
- One or more specific channels
This gives you precise control over which connected devices or software sources can send Remote Knobs data to Electra One.
Note: MIDI messages received on the ports and channels assigned to Remote Knobs are handled internally by the controller and are not forwarded or processed by other parts of the system.
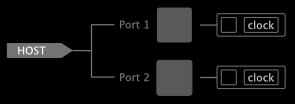
Outbound Interface
The Outbound screen lets you configure where Electra One will send Remote Knobs messages when preset controls are adjusted on the controller (with knobs or touchscreen).
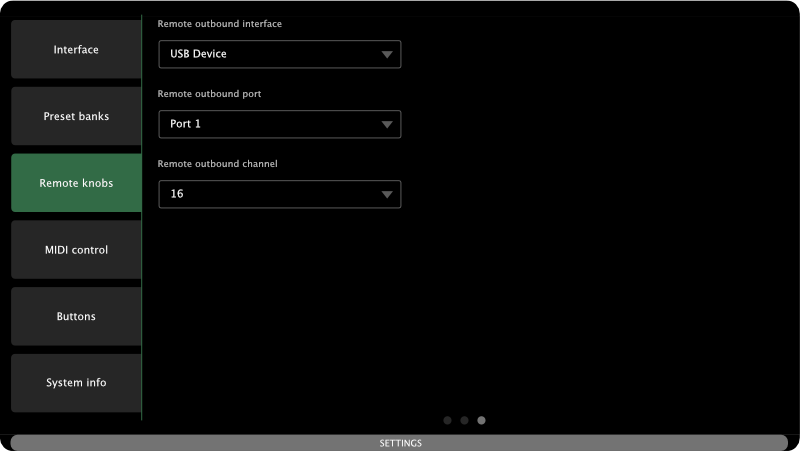
You can choose a MIDI interface for sending these messages, or disable outbound transmission entirely. If an interface is selected, you must also specify:
- A MIDI port (Port 1 or Port 2)
- A MIDI channel
Unlike the inbound configuration, where multiple sources can be enabled, the outbound routing supports only one MIDI destination at a time. A valid MIDI channel must be selected, as Electra One needs to know exactly where to send the Remote Knobs messages.
This setup allows Remote Knobs activity on Electra One to be recorded or processed externally, such as by a DAW or another MIDI device. If you do not need this, keep the Outbound messages disabled.

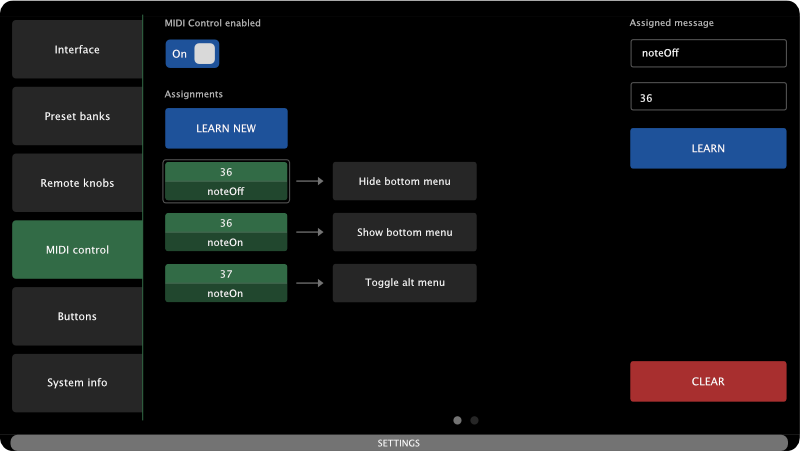
MIDI Control
The MIDI Control feature allows you to map external MIDI messages to internal Electra One commands and actions. It works similarly to Remote Knobs, but instead of controlling on-screen parameters, it triggers system-level functions.
Configuration
You can assign incoming MIDI CC, Note, or Program Change messages to a wide range of Electra One actions, such as:
- Switching presets or pages
- Opening windows (e.g., Snapshots, Captures, Settings)
- Toggling performance and alt mode
This makes it possible to control Electra One using an external MIDI controller or a computer, greatly expanding performance and integration options.
For example, using a pad controller like the Novation Launchpad Mini, you can easily map its pads to act as extra buttons for triggering Electra One functions, such as switching pages, sending patch requests, or opening snapshot banks.
A full list of available actions is provided in the section below.
The MIDI Control feature is configured using two dedicated screens, accessible within the MIDI Control tab:
- Mapping Screen
- Inbound MIDI Routing
Mapping Screen
This screen allows you to create MIDI control assignments using MIDI Learn.
To create a new assignment, tap the [LEARN NEW] button. It will be highlighted with a yellow outline, indicating that the controller is now waiting for a MIDI message to learn. If you want to cancel the process, simply tap the button again to disarm it.
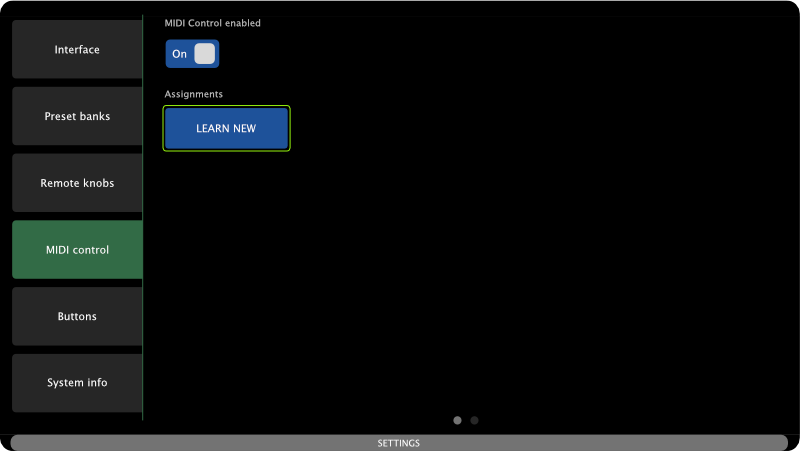
When MIDI Learn is armed, press a pad, turn a knob on a connected MIDI controller, or send a MIDI message to Electra One. The controller will capture the first valid MIDI message it receives and create a new assignment based on it.
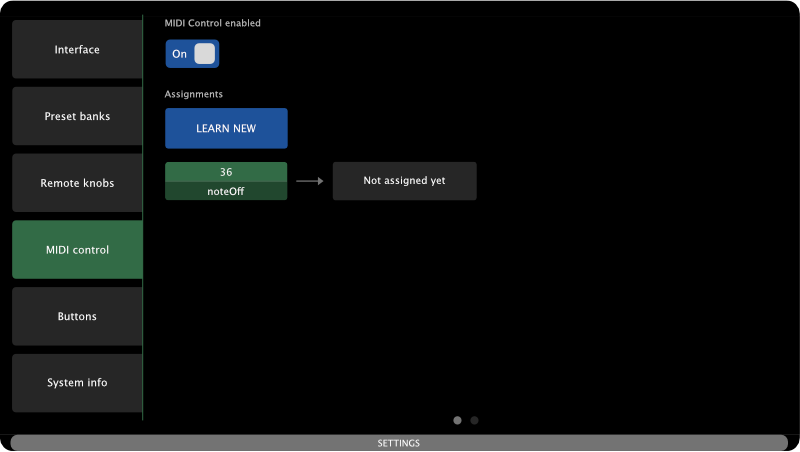
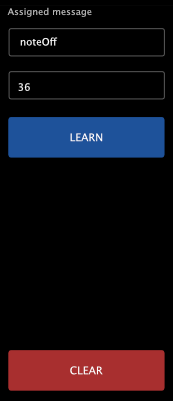
The image above shows Note On #36 as the learned MIDI message. It currently has no Electra One command or action assigned, which is indicated by the Not assigned yet box.
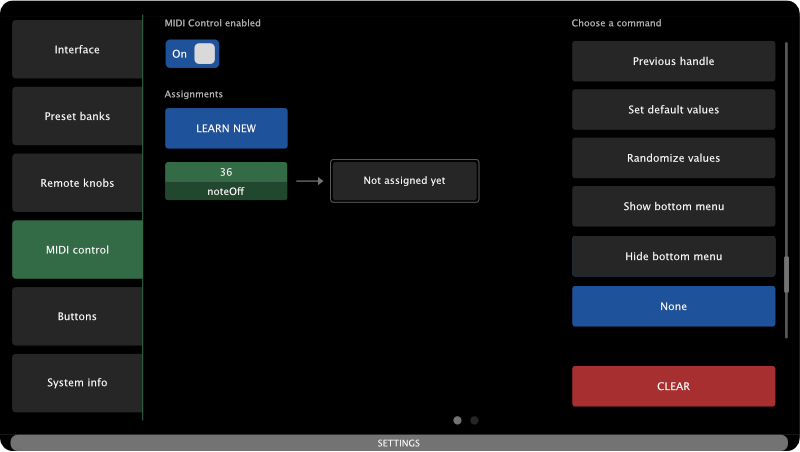
To assign a command, tap the Not assigned yet box. It will be highlighted with a light gray outline, and a swipeable list of available commands will appear in the right sidebar. Swipe through the list and tap the command you want to assign to the previously learned MIDI message.
To change the MIDI message of an existing assignment, tap the MIDI message you wish to change. It will be highlighted with a light gray outline, and detailed information about the message will appear in the right sidebar.
In the sidebar, you’ll find a [LEARN] button. Tap this button to arm the learning mode and assign a new MIDI message, which will replace the existing one. To remove the assignment, tap the [CLEAR] button.
Inbound MIDI Routing
This screen determines which MIDI inputs Electra One listens to for MIDI Control messages. It is identical in layout and function to the Inbound Routing screen in the Remote Knobs configuration.
MIDI input sources are listed in rows. Each row includes a checkbox to enable or disable that input. Active inputs appear green; inactive ones appear gray. A sidebar on the right lets you choose which MIDI channels are monitored for the selected input.
MIDI activity indicators and a log window help you verify incoming messages in real time. Messages routed to MIDI Control are consumed internally—they are not forwarded through the MIDI router and are not processed elsewhere in the system.
For futher information please refer to the Remote Knobs Inbound routing description.
Buttons
The Buttons settings screen allows you to customize the commands and actions assigned to Electra One’s hardware buttons. The available commands are nearly identical to those used in the MIDI Control feature, providing consistent control options across both systems.

For the physical layout of the hardware buttons, refer to the First steps section.
Default Layout
A global switch lets you enable or disable the default layout (the factory-defined set of button assignments).
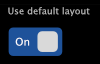
When the default layout is enabled, your custom button configuration is temporarily ignored, but not deleted. Disabling the default layout will restore your custom assignments without the need to reconfigure anything. This makes it easy to switch between factory and user-defined setups as needed.
Modes
To expand the number of assignable functions, Electra One supports two button modes:
- Normal Mode – The default set of button assignments.
- Alternate Mode (Alt Mode) – A secondary set of button assignments, activated by triggering the
Toggle Alt Modecommand. To use it, you must assign theToggle Alt Modecommand to either a hardware button or a MIDI Control assignment. This allows each hardware button to perform two different actions, depending on the current mode.
To switch between the two modes use the mode switch:

Button Assignments
The screen displays a column of six buttons, arranged in two groups of three, representing the physical hardware buttons on the controller and their assigned commands.
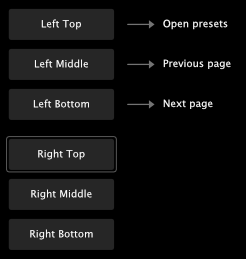
To change a button’s assignment, tap on the desired button. It will be highlighted with a light gray outline, and a list of available commands will appear. Simply tap the command you want to assign to that button.
System Info
The System Info screen provides a summary of key details about your Electra One controller.
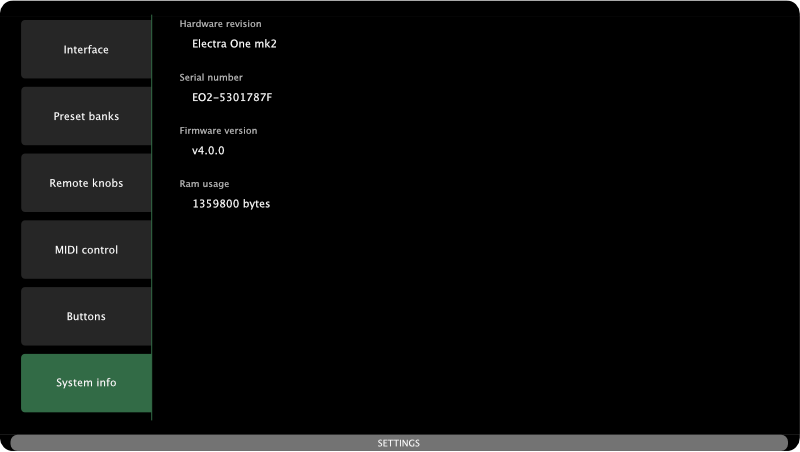
It provides info about:
- Hardware revision
- Serial number
- Installed firmware version
- Current RAM usage
This information is useful for troubleshooting, verifying your setup, or when contacting technical support.