Bootloader
Every Electra One controller comes with a built-in bootloader—a special low-level application that runs independently of the main firmware. The bootloader allows you to manage essential maintenance tasks, such as updating the firmware and accessing files stored on the controller’s internal SD card.
Key Features
- Firmware Update – Install new firmware versions to keep your Electra One up to date.
- Firmware Management – Store, select, and delete multiple firmware files for testing or recovery.
- USB Disk Mode – Access the controller’s SD card as a USB drive for file transfer and management.
- Failsafe Recovery – Enables recovery from failed updates by remaining fully functional even without the main firmware. It also allows you to restore factory files on the SD card using provided disk images.
Entering Bootloader Mode
There are three ways to access the bootloader, depending on the condition of your controller, for example, whether the main firmware is functioning properly or the device is unresponsive, as well as your configuration and convenience.
On Power-On
The Power-On procedure is useful when your controller is powered off or if the main firmware is not functioning properly—for example, after a failed firmware update.
- Make sure your controller is disconnected from the USB power.
- Press and hold the
[RIGHT-BOTTOM]hardware button. - Power on the controller.
- Release the
[RIGHT-BOTTOM]button.
If entered correctly, you will see the Electra One Bootloader menu.
Using buttons
If your controller is running and you are using the default button layout, you can access the bootloader using a hardware button combination:
- Ensure you are on the preset page, with no Page or Preset selection screens open.
- Press and hold the
[RIGHT-BOTTOM]button (bottom-right). - While holding it, briefly press the
[LEFT-TOP]button. - Release the
[RIGHT-BOTTOM]button.
If performed correctly, the controller will restart and enter the bootloader.
Using Menu
You can access the bootloader at any time using the Menu, regardless of whether you're using the default button layout.
- Ensure you are on the preset page, with no Page or Preset selection screens open.
- Swipe the screen down to open the Menu.
- Press and hold the
[RIGHT-BOTTOM]button (bottom-right). - While holding it, briefly tap the on-screen
[REBOOT]button. - Release the
[RIGHT-BOTTOM]button.
If performed correctly, the controller will restart and enter the bootloader.
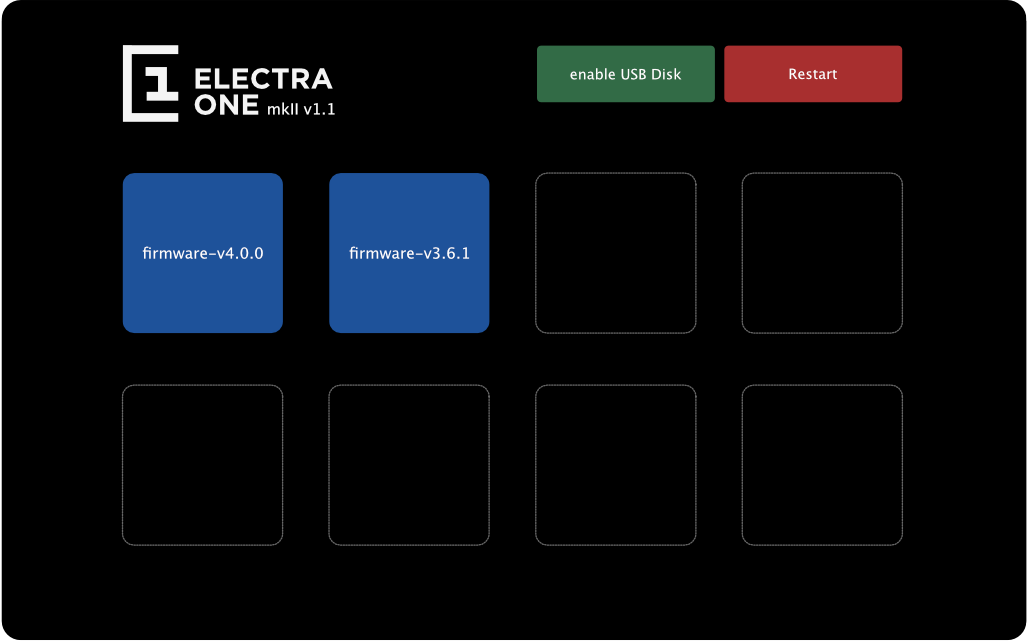
Bootloader screen
The bootloader screen is divided into two three sections:
- Bootloader version info
- On-screen Buttons
- Firmware images
Bootloader version
The bootloader version is shown at the top-left corner alongside the Electra One logo. It is important that you have the latest version of the bootloader installed. At present the most recent version is v1.1.

On-screen Buttons
There are two buttons. One to enable the USB Disk Mode and the other to restart the controller.

USB Disk Mode
One of the key functions of the bootloader is USB Disk Mode. When enabled, this mode exposes the Electra One's SD card to your computer as a USB storage device.
To enabling USB Disk Mode, tap the green [Enable USB Disk] button on the bootloader screen. Once enabled, the button changes to [USB Disk enabled] and your computer will detect a USB drive named ELECTRA.
While in this mode, you can perform common file management tasks, including:
- Copying, moving, renaming, or deleting firmware files
- Managing presets, Lua scripts, and configuration files
- Completely replacing the contents of the drive using a factory disk image
There are some limitations, however, you cannot however:
- You cannot format the Electra One disk
- You cannot run file system checks or repairs
If the SD card becomes corrupted or unresponsive, you must remove it from the controller and use a computer with an SD card reader to format or repair it.
Note: Always eject the disk safely before unplugging or restartingthe controller to avoid file corruption.
Restart
The [Restart] button restarts the controller.
- If no hardware buttons are pressed when tapping
[Restart], the controller will boot normally into the main firmware. - If you hold the
[RIGHT-BOTTOM]hardware button while tapping[Restart], the controller will restart and return to the bootloader instead.
Firmware images
The Electra One bootloader supports up to eight firmware slots, allowing you to store and manage multiple firmware images on the controller at the same time. These can include the current version, older releases, beta builds, or even alternative firmware versions. You can switch between them at any time.
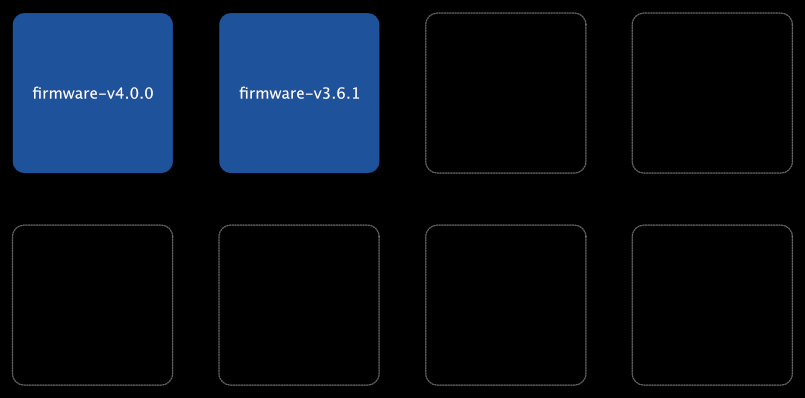
Each used slot corresponds to a .srec file located in the boot folder on the controller’s internal SD card:
- Used slots are shown as blue tiles with the firmware filename.
- Empty slots appear as grayed-out tiles.
A maximum of eight .srec files can be stored in the folder. Any additional files will be ignored by the bootloader and will not be shown.
To add, rename, or remove a firmware image, simply perform the corresponding action on the .srec file(s) in the boot folder on the internal SD card, either via USB Disk Mode or by accessing the SD card directly using your computer.
To flash (activate) a different firmware version:
- Tap the tile of the firmware you want to use.
- The update process will begin automatically.
Once complete, the controller will reboot and start running the selected firmware version.
Firmware Update
As of firmware version 4.0.0 and bootloader version 1.1, firmware updates can be fully managed using the Electra One online web application. However, the bootloader can still be used to update the firmware manually, just as in earlier versions. Detailed information about updating the firmware using the Bootloader Disk mode is available in Firmware update article.
Bootloader Update
Occasionally, the bootloader itself needs to be updated. As of firmware 4.0.0, it is possible to update the bootloader using the app.electra.one web application.
WARNING
If you purchased your Electra One before May 2025, your controller likely has bootloader version 1.0 installed. In that case, it is highly recommended to update the bootloader.
The bootloader version can be viewed on the bootloader’s main screen. It is displayed near the Electra One logo. For details, see the section Bootloader version.
Update procedure
To update the bootloader, follow the steps below:
- Connect your Electra One directly to the computer that will be used for the update. Do not use a MIDI router or hub for this connection.
- Ensure that firmware version 4.0.0 or later is installed on your Electra One.
- Navigate to the Bootloader Update page on app.electra.one website.
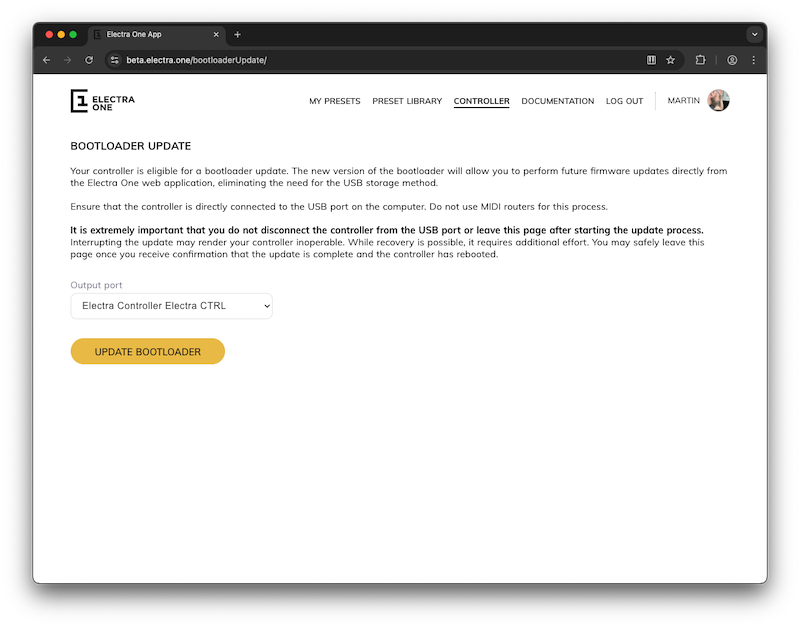
- Carefully read the instructions provided on the Bootloader Update page to ensure everything is set up correctly.
- Make sure Electra’s control port is selected as the MIDI output port:
- On macOS, it appears as
Electra Controller Eletcra CTRL - On Windows, it appears as
MIDIOUT3 (Electra Controller)
- On macOS, it appears as
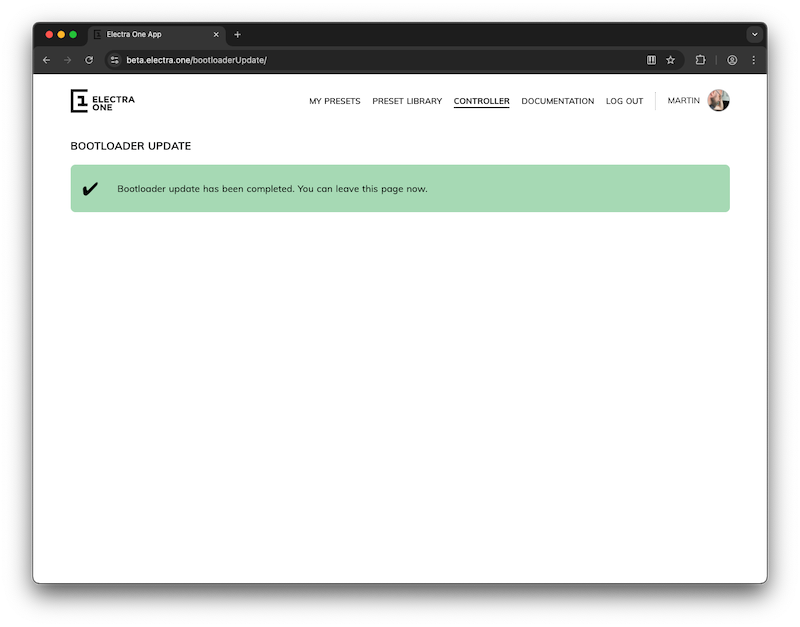
- Click the
[Update bootloader]button on the page. - Both the Bootloader Update web page and the Electra One controller screen will display progress feedback. The controller will restart automatically once the update is complete.
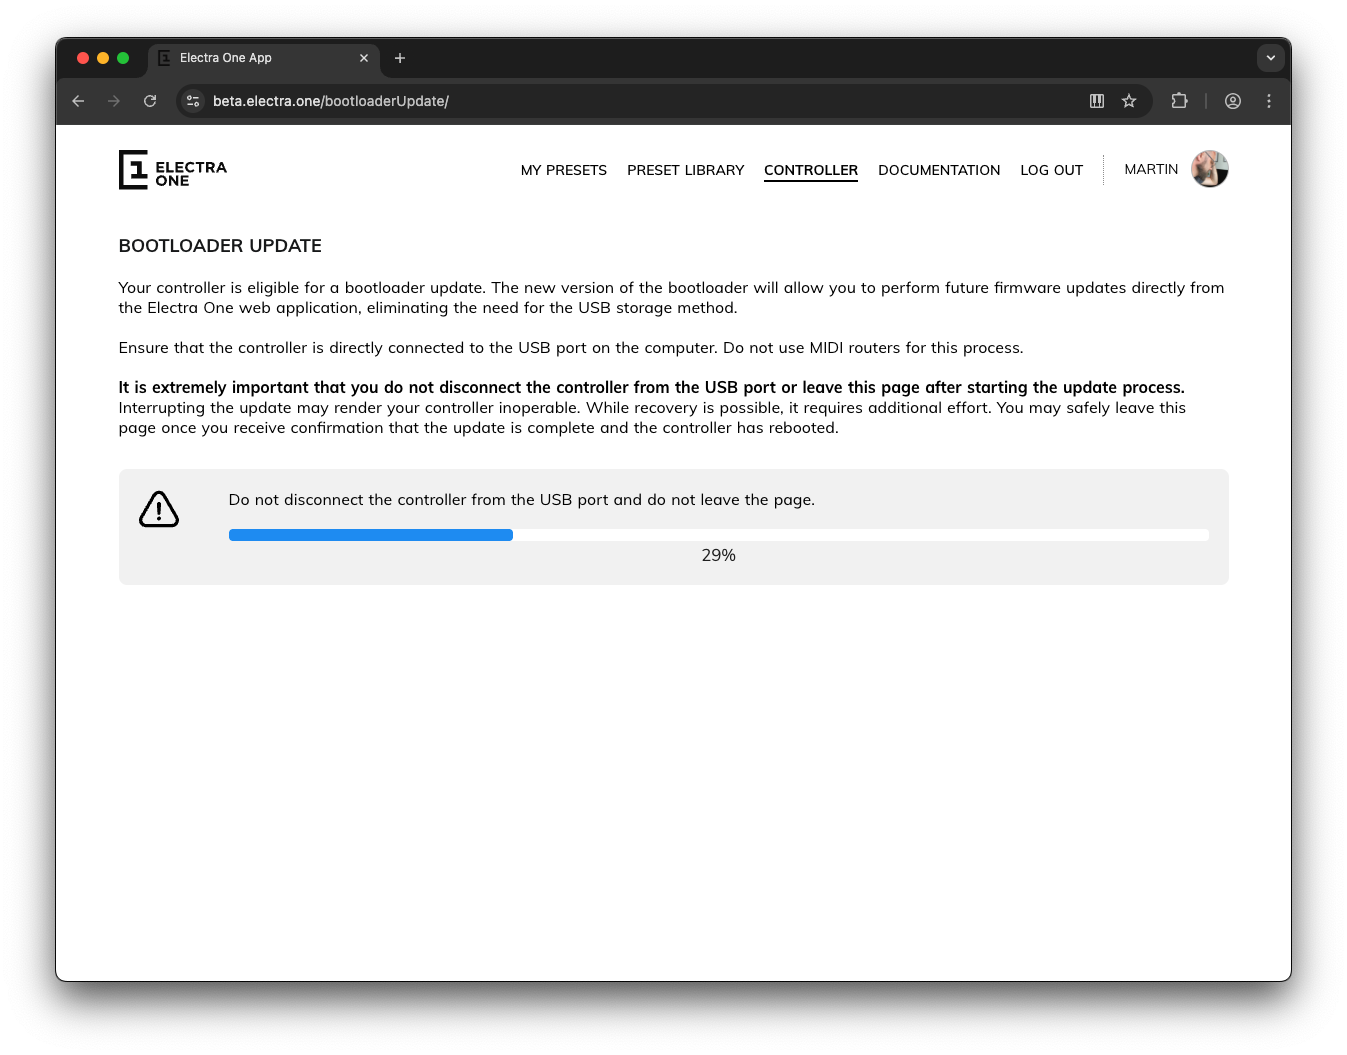
- The Bootloader Update page will provide confirmation that the update is completed.